It is a crazy world we live in. Yesterday we use to test Kubernetes on our trusty virtualization platform. Today we are very busy containerizing workloads, getting rid of virtualization and old infrastructure in the process.
Tomorrow we control all infrastructure using the k8s api? I surely hope so: we like to push some change to the infra repository and lean back while the k8s reconciliation loop is configuring infrastructure accordingly. I choose this over traditional config management any day!
KubeVirt and OKD Virtualization allow you to host the occasional virtual machine you can’t get rid of.
If you have no idea what KubeVirt is, please read about my introduction with the product: https://maarten.gent/posts/kubernetes/running-virtual-machines-in-kubernetes/
Check this image out and try to wrap your head around what is going on:

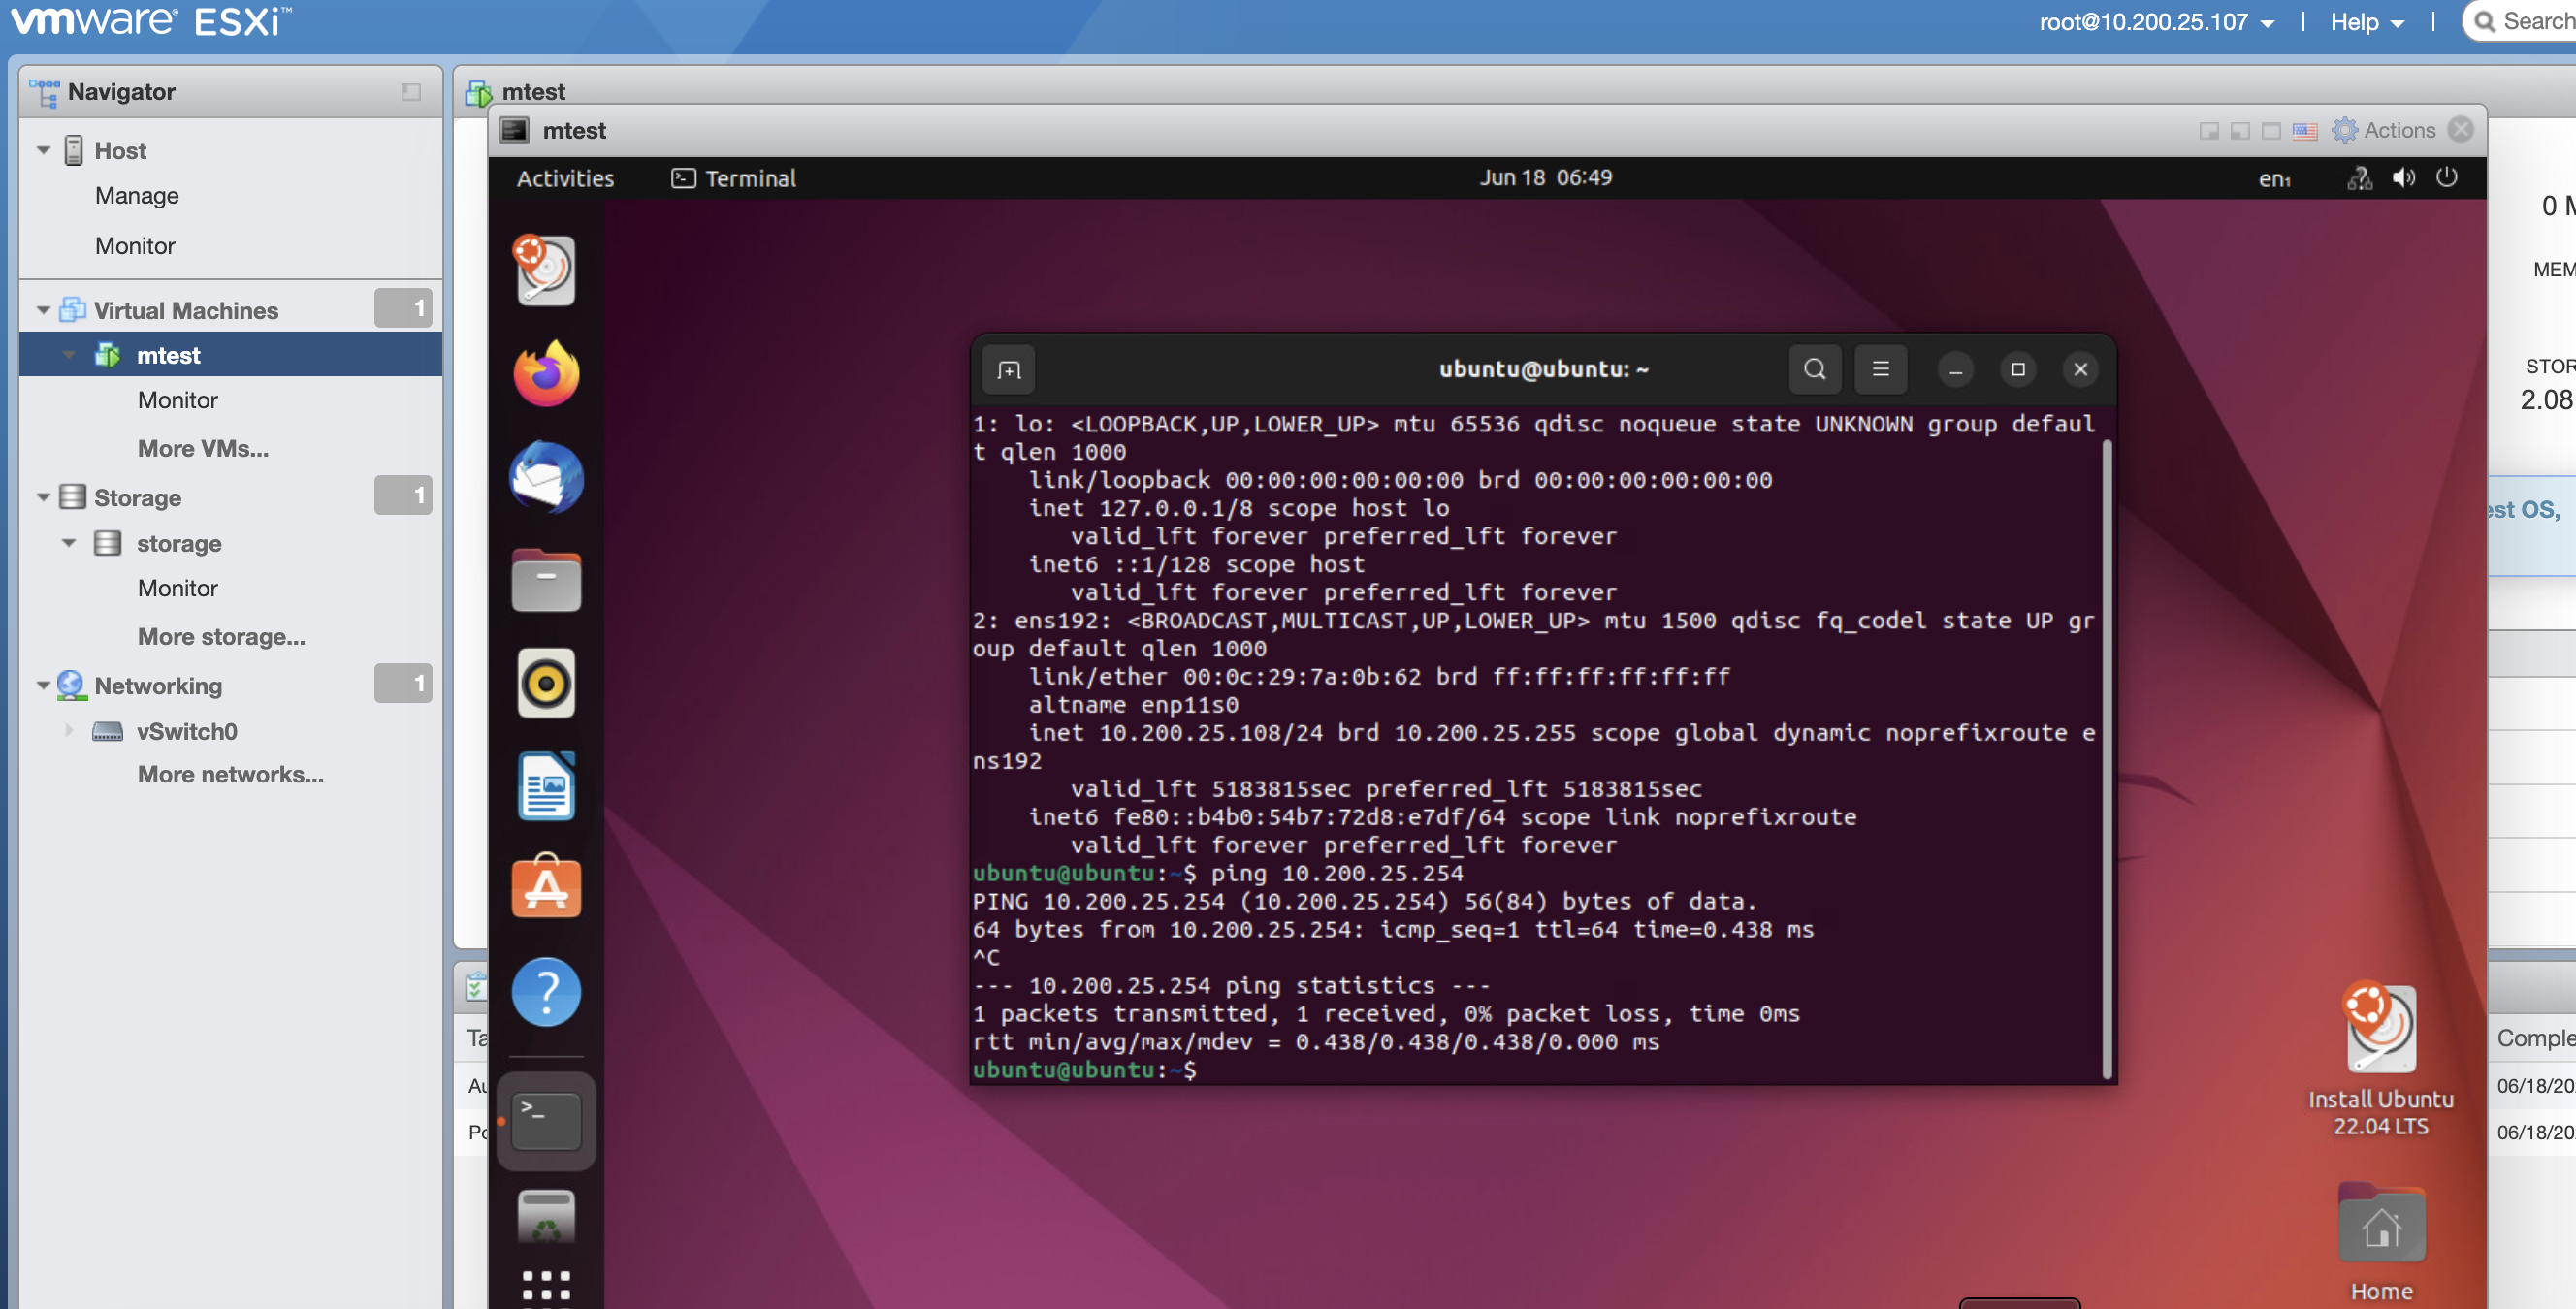
In case you are not so familiar with VMWare and/or Openshift, this is the ESXi (core VMWare virtualization) interface.
If you still don’t get it: the image suggests we can create VMs, in a VM, in an Openshift pod.
How about running a k8s cluster in our brand new virtualization platform? This is a joke but it is mind boggling, right? Real Inception-style stuff going on here.
To be clear: we really do have a useful use case: consolidating some ancient machine that is just there to occasionally build or test something against ESXi.
Turns out this works perfectly. No trickery was involved creating the above image. Let’s see how we got there in this post!
It makes sense
Nested virtualization is probably around since virtualization is a thing. I have always known it as a somewhat hidden feature of any virtualization technology.
I can think of some use cases:
- You want to use
KubeVirton the public cloud or your virtualized k8s cluster. - development VM and you want to run the popular
Vagrant/VirtualBoxcombo. - Cost effective way of testing virtualization infra (my use case)
- Nerd out Inception style. Because it is possible and educational.
Since a container is basically a process with some special kernel features and a pod is a collection of containers, there is no reason why we could not do VMs. Then nested virtualization on Openshift makes sense too.
How?
Your host needs to be configured to support nested virtualization. You need to configure your VM correctly and there are some limitations with virtualized hardware support in ESXi.
Host config
Nested virtualization must be enabled on the (bare metal) host system for it to work. Turns out OKD does this out of the box:
cat /sys/module/kvm_intel/parameters/nested
Y
So nothing to do here, assuming Red Hat does not change this behavior. Nested Virtualization is not officially supported by Red Hat.
KubeVirt
CPU passthrough
I was stuck for quite some time: nested virtualization was enabled, ESXi was installed, but VMs crashed with a kernel panic right away in the boot process.
Turns out you need to enable CPU ‘passthrough’ mode: https://kubevirt.io/user-guide/virtual_machines/virtual_hardware/#cpu-model-special-cases
Similar with what you have to do in OVirt. When this hurdle is taken, nothing stops you from starting VMs in your VM.
Prepare VM
I am not experienced using KubeVirt so my procedure to install ESXi might be a little unorthodox but it works and is easy. I used the user friendly OKD web interface wizard.
Start from a Linux template, I chose ‘CentOS Stream 9’.
Boot source
I uploaded the ESXi ISO file to an internal web server and in the ‘Boot source’ step I filled out the ISO URL. Don’t forget to check the box ‘This is a CD-ROM boot source’. The size can be small, 1G for example.
You can download an ISO from VMWare and use it for evaluation for free, after registration.
The next step can be skipped mostly, just fill out a sensible name. It is important you customize first, so make sure you don’t start it right away.
Be sure to select sufficient CPU and RAM resources. If the existing flavours are too limited, it is also possible to update the VM yaml manually.
Network
Here I assume OKD is configured to use different internal networks (vlans) in Openshift. How to do this, is for some other time. It involves NMState and NetworkAttachment definitions if you can’t wait.
Important here is that you NOT enable the ‘mac spoofing check’ in the multus configuration. Our nested VMs will emit network traffic using a different MAC address from the ‘physical’ VM.
I opted to add a second network interface next to the standard ‘k8s internal’ interface. Select the defined NetworkAttachment to attach the VM to some physical network.
It is important that you change the network ‘model’ from virtio to e1000e. You need to do this for both network interfaces. I also had to set networkInterfaceMultiqueue: false in the VM yaml source.
Disks
Next to the CD-ROM disk, we need two extra disks:
- Root disk: 4G is sufficient
- datastore disk: storage for your VMs: f.e. 100G
Here you have to make sure the interface is sata instead of virtio.
You can delete the cloud-init disk since we don’t need it, but is added because of the template.
ESXi
As you noticed we had to select specific ‘hardware’ for the disks and networking. ESXi is very limited in the hardware it supports.
The ESXi setup is very easy: just start the VM and the ESXi setup will pop up after the boot process. Follow the wizard to choose things such as the root password. Select the small disk as root disk.
Finally start your ESXi VM. After about a minute, the URL will be visualized that you can visit to manage your brand new virtualization platform. Use the root credentials that you provided earlier in the setup wizard.
Datastore
You can easily create a new datastore using your large disk (f.e. 100G) to be used for your VMs in ESXi.
vSwitch
I disabled security checks in the default vSwitch while debugging but this is probably not necessary. Unless you do nesting one level deeper of course…
Conclusion
Again, I was pleasantly surprised how little configuration was required to do crazy stuff like this. We can finally retire yet another bare metal server and replace it by a k8s pod.
There are a few bumps that can stop you from doing this, but I believe I listed them all here.
To be clear, you obviously sacrifice some performance in a setup like this, but it is still surprising fast.
Here a concluding shot of an ubuntu VM running in the ESXi web interface: